
Lately I’ve been so overloaded with school work, assignments and exams. I have a Geography and English task due next week, a Math exam on Monday, a Science exam next Friday and on top of that, I’ve got to prepare for a Music performance on Wednesday. So what do I do? I decide to make tassel bracelets. Maybe I should work on my prioritising skills…
Anyway, today’s Fri-DIY is super fun and looks great. I must say, it was a worthwhile project to get a break from my hardcore studying. You only need a couple of materials to make a tassel bracelet, which you can easily pick up from your local craft store or dollar shop.
The thing I love about tassels is that you can use them on all kinds of things, such as book marks, charms, necklaces and key rings. Just because this is a bracelet tutorial, it doesn’t mean that you need to limit yourself in making a bracelet only!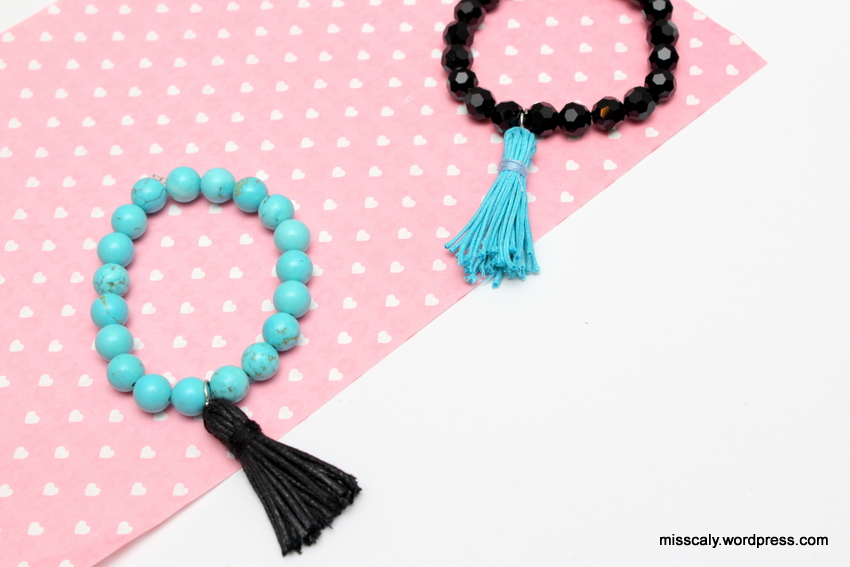
Things you will need:
To make the tassel:
Wax linen chord // Needle and thread // Piece of cardboard // Scissors // Pliers // Jump ring
To make the bracelet:
Beads // Elastic bracelet string
Method: (See steps down below)

How to make the tassel:
- Cut a piece of cardboard with dimensions 5cm x 2.5cm. Then, cut 11cm of wax linen string and place it on top.
- Cut another piece of wax linen string 76cm long. Then, wind it around the cardboard and over the other piece of string.
- Use the short piece of wax linen string to tie a knot around the long one.
- Slip the bundle of string off the cardboard. (See photo above on what it should look like).
- Use a needle and thread to wrap around the top of the bundle 10 to 15 times.
- Then, make a few stitches with the needle to secure it, and poke it down the middle of the bundle of string to hide it.
- Use scissors to cut the excess thread. Also cut the bottom loops of string in half.
- Use pliers to slip a jump ring around your tassel. YAY, you’ve completed your tassel now. (You’re halfway there!)
- To make the bracelet: Cut a piece of elastic-bracelet-string 8cm longer than your wrist size.
- Thread some pretty beads onto the elastic then tie it with a double knot. You can hide the excess elastic by threading it into the adjacent beads.
- Attach your tassel to the bracelet using pliers.
And there you have it! Your very own DIY tassel bracelet (*crowd cheer*)

You can even these up along with some other colours and patterns to make a bracelet set. This would be great as a gift for a friend or just for yourself.
So that’s all for today!
xx, 
Don’t forget to follow me on social media for future updates!


That is an adorable DIY!
LikeLike
It is, isn’t it?
LikeLike
Yep, cheering!
LikeLiked by 1 person
Yay! Thanks for dropping by 🙂
LikeLiked by 1 person
Congratulations Caly, I nominated you for the Liebster Award! Check out the link here:
http://irvinshandy.com/2015/08/10/awards-liebster-award/
LikeLike
Such a pretty post. Jo @ Let’s Face the Music
LikeLiked by 1 person
Thank you! I love your blog too 🙂
LikeLike